12.29.2009

Christmas Candy - Orange Sticks


These went over pretty well. They are really simple and pretty impressive. Cut off the ends and score the peel of the oranges so that the peels come off in sort of quarter sized chunks. Slice them up into matchsticks. Boil in water for 3 minutes, drain, rinse, repeat for a total of 3 boil sessions. Then boil peels in simple syrup (1 part water to 1 part sugar) for 1 hour. Drain and let cool. Dip in melted bittersweet chocolate chips (I threw in a bit of butter to ensure a shiny finish) and there you have it...homemade orange sticks. Enjoy!

12.15.2009

First Success


So sorry for the iPhone picture, but it's all I had at the time, and I was too excited to miss the moment. I had my first gluten free baking success! It only took 3 tries at a relatively simple scone recipe to convert it to gf and still have something that stayed together when picked up...and didn't run all over the oven when baking. I really under estimated the complexity of gluten free baking and any of you that are reading this who've been doing the gf baking thing much longer than I, you're probably thinking, "well duh". I know, I read it over an over again, that it's a process, and takes time to get the flour combinations just right and the fat, to baking soda combinations just right, but i still went on confidently thinking it just couldn't be that hard...there has to be a magic substitution that works for everything, and, well, that's just not the case.

So over the last several weeks, while the posting has been sparse, I've been experimenting, and failing, at baking gluten free. I have found some great, although expensive, prepared gluten free food, and have also learned quite a few tolerable restaurant options..including navigating through a company Christmas party held at an Italian restaurant of all places. Anyway, I have many other adventures and failures to share, but I wanted to start with a success...(I hope it wasn't just a fluke!)

Cranberry Cream Scones
adapted from Smitten Kitchen (as usual!)

2 1/2 cups gluten free all-purpose flour mix (I used Pamela's Baking Mix)
1 teaspoon xanthan gum
1/2 cup sugar
3/4 tablespoon baking powder (1 if using a gf or g flour mix that doesn't include baking powder)
1/2 teaspoon salt
5 tablespoons cold unsalted butter, cut into small cubes
1 1/4 cups dried cranberries
1 large egg
1 large egg yolk
1 cup heavy cream

Preheat oven to 400°F.

Whisk flour, 1/2 cup sugar, baking powder, salt, and xanthan gum together in large bowl. Drop in ice cold butter cubes and cut in with pastry blender (or you can use a food processor if you're afforded such luxuries...but I'm not judging) until mixture resembles coarse meal. Stir in cranberries and put back in refrigerator.

In another small beat egg and yolk until foamy and stir in cream. Remove flour mixture from the refrigerator add egg mixture to flour mixture and stir until just combined.

On a well-floured surface with floured hands pat dough into a 1.5-inch-thick square and with a large knife or pizza cutter cut into 8 wedges. Place wedges about 2 inches apart from each other on a piece of parchment paper and stick in the freezer for 15 minutes (if freezing for later use wrap in plastic wrap and stick in freezer bag at this point after the initial 15 minute freeze). Pull out of the freezer and place, with parchment paper, on baking sheet. Bake for 15 minutes until golden brown.

Remove parchment paper with scones from hot baking sheet and serve warm.

Keep refrigerated individually wrapped in plastic wrap and foil.

12.12.2009

I want this

I'm in love with this rug. Wouldn't it be perfect in a kitchen? Not sure the bf would like it or if it goes very well with the Jayhawk Crimson red wall in the dining room....but I'm keeping it in my wants file anyway

I've always been a little hesitant of yellow rugs, but this room serves as great inspiration for tying in yellow on the floor.

Have a great weekend!

11.26.2009

Gluten Free


When I was in second grade I couldn't stop throwing up. I went from the doctors' office to home to the doctor's office and missed school for 2 weeks lost 14 pounds and wasn't well for a long time after that. When leaving for state basketball my freshman year...my stomach hurt. State basketball my senior year...my stomach hurt. In college whenever I had strep throat (which was 3-4 times a year) my stomach would hurt and lead to dry heaves during basketball practice, and after my final basketball season I got strep throat and took antibiotics, got strep throat, took antibiotics...repeat for a total of 6 cases of strep throat..in 3 months!

I've always thought of myself as being tough, but looking back at all of these times when I've felt sick has lead me to question whether I'm really tough at all. To everyone else I might look like the sick kid.

Over the past year and a half, I've had a stomach ache probably 3-4 times a week (my bf would probably think that number is too low) and felt so uncomfortable that I couldn't sleep laying on my stomach.

I finally broke down and made a doctor's appointment though I felt like the most unsick crazy person in the waiting room. We talked and talked. She thought my symptoms didn't really sound like anything, and was leaning toward a diagnosis of IBS, (irritable bowel syndrome..the universal your stomach hurts for no tellable reason, but we'll give you a diagnosis so you feel less crazy! diagnosis) however, with my insecurities I may not have explained all of my symptoms that well and also hid some thoughts and tried to not sound too crazy.

She took blood and it came back showing some bacterial infection in my stomach...I went through 2 rounds of antibiotics and Prilosec and tried to convince myself that fixed everything. It didn't.

I started recording what foods I ate and how I felt knowing that things might stay in my system over time and not point to a clear answer, but it was a start. Then I just decided to try and eliminate some of the big alergens from my diet, one at a time, and see what happened. I started with milk. I looove milk. I drink it by the glassful at night with all kinds of baked goods. I didn't want it to be a problem with milk, but remember growing up that my dad (whom instilled in my my love for milk) had once seemed, to me, to be lactose intollerent. After about a week, I had mixed emotions when the stomach aches hadn't gone away. I googled and googled and googled and found symptoms of celiac disease (oh that word sounds so daunting). It really sounded like most of my symptoms. It was going to be an extreme experiment which brought back all of my insecurities...how will I maintain this experiment at work lunches, will by bf think I'm crazy?...what about my farmer parents...gluten free has become such a trendy catch phrase around the more libral areas of the state.

Well it's been nearly a month and overall, I feel great. It would be nice to say that I haven't had a stomach ache since...but I have, however few and far between, and could be attributed to cross contamination. I haven't been "checked" for Celiac (you have to be eating gluten for that test to be accurate..and I haven't wanted to feel sick) So I'm still experimenting, trying to convince myself that I know what the results will be before I have the test run....to minmize the crazy feeling :)

Here I am at Thanksgiving with my parents who have totally adapted dinner today for me. My mom has found a new sweet potato recipe and is substituting corn starch for flour, was very interested in making homeade gf cornbread stuffing, axed out the green bean casserole (which has been on the table for most of my 26 Thanksgivings) substituted for creamed corn, and modified the gravy to be made with cornstartch instead of flour.

I brought a gluten free pie crust home and made homemade pumpkin pie that I'm praying no one can taste the non-gluten difference in.

This meal, this feeling, among hundreds of other blessings, is what I'm thankful for.

11.21.2009

Simple DIY Milk Frother

Oh my goodness. I just had the best milky sweet hot caffeinated beverage cup of coffee from home possibly ever, and that's with having owned this and this and this...so I've had some experience with trying to produce an equivalent to the addictive concoctions produced at the wonderful-comforting-$4/cup-of-coffee place that resides on almost every street corner.

Anyway, this is so simple that it's probably not even worth mentioning and I was probably the only person that couldn't come up with this myself..but I had to get the idea from here.


image from thekitchn.com


And paired with about a 1/4 cup of strongly mixed Nescafe (or I'll try Via next for an even more authentic taste but the Nescafe is 7 packets for $1.50.,,can't beat that!) and some honey this is officially my morning drink of choice and it only cost me about 30 cents!

Ok, that's all for now. I couldn't wait to share. Have a great weekend!

11.14.2009

Raspberry Cake

I am unfortunately not feeling all that creative at the moment. It's been kind of a blah day. I don't feel like I've been particularly productive today, and I need my Saturday's to feel productive, because if not, then it becomes Sunday which is the day before the next work week starts so I feel pressure to relax, but I also have to get done all of the things that needed to get done on my two, tiny, fly-by, days off from work! Guess I should get over it and go be productive. However, I have one I'm-too-old-but-still-watch-highschool-drama tv shows to watch that has been sitting on the bf's dvr since Monday...yeah, I think I'll do that instead...

But first, Raspberry cake. We neeeded a dessert. We had eggs, flour, buttermilk...and raspberries. So what better to whip up than a raspberry cake. From start to serving plate took about 1 hour (if you like warm cake..which I happen to love)

Raspberry Cake
recipe adapted a smidgen from Smitten Kitchen

1 cup all-purpose flour
1/2 teaspoon baking powder
1/2 teaspoon baking soda
1/4 teaspoon salt
1/2 stick unsalted butter, softened
2/3 cupplus 1 1/2 tablespoons sugar, divided
1/2 teaspoon pure vanilla extract
1 large egg
1/2 cup buttermilk
1 cup fresh raspberries*

Preheat oven to 400°F. Butter and flour a 9-inch round cake pan.

Whisk together flour, baking powder, baking soda, and salt and set aside. In a larger bowl, beat butter and 2/3 cup sugar with an electric mixer** at medium-high speed until pale and fluffy, about two minutes. Add egg and beat well.

At low speed, mix** in flour mixture in three batches, alternating with buttermilk, beginning and ending with flour, and mixing until just combined. Using a spatula to aid, empty bowl of batter into cake pan and smooth top. Drop raspberries evenly over top and sprinkle with remaining 1 1/2 tablespoons sugar.

Bake until cake is golden and a toothpick inserted into center comes out clean, 20 to 25 minutes. Cool in pan 10 minutes, then turn out onto a rack and cool to warm, 10 to 15 minutes more. Invert onto a plate.

* I didn't measure my raspberries, I just used a whole carton.

** My stand mixer was dirty...and had been for two days. As I hate doing dishes, I chose to do the beating by hand. I probably didn't beat it for for the durations listed, but no harm was done.

11.12.2009

In the Christmas Spirit!

A browse through target.com and this DIY Pumpkin Spice Latte got me totally in the holiday spirit...even though it's only November 12th! I need to find some room for these cute little trees and one of these and one of these cozy homeade feeling stockings! The bf isn't big on Christmas decorating since we both spend the time right around the holidays at our parents' houses, but this might be the year I force the Christmas spirit upon him!


and a recap from my birthday!

He also made this delicious pizza

and bought some wonderful gluten free (more on that later) cupcakes (470 calories a piece!) from Whole Foods, and tonight I polished off the last one!

Also working on some blog updates that I hope to be excited to share...there was one final birthday surprise!

11.09.2009

28 To Dos before 28!


Ahh..great birthday. I'm sitting here blogging with my glass of wine (that the bf brought home along with flowers and a dough hook for my stand mixer!) while he cooks supper in preparation for watching some Monday night football.

I've compiled this goal list of things to accomplish during my 28th year on this earth. I'll keep updating this post as I cross things off the list. Without further ado...

1. Finish P90X..all 90 days of it.
2. Take a class (photography, cake decorating, biomedical engineering..something!)
3. Go 1 entire month maintaining 3 blog posts per week.
4. Bake and decorate a layer cake.
5. RECYCLE! (even though i have to drive my stuff to the closest center because my unit doesn't offer recycling pick up).
6. Finish the bf's kitchen cabinet project.
7. REad all 633 pages of The Book of God (I've owned this book for going on 8 years!)
8. Run 13.1 miles while being timed.
9. Break out of the ugly brown leather work shoe rut.
10. Buy an outfit that makes me feel stylish and beautiful..without paying too much attention to the price tag.
11. Go out to dineer at a restaurant I've never heard of based only on online reviews.
12. Cook a meal for someone besides the bf!
13. Pretty up the bf's laundry room..with this as inpiration!
14. Read more books...6 in the next year! (audio books count!)
15. Take more pictures.
16. Go sledding!
17. Wear earings once a month (that's 12x more often than I currently do!).
18. Plan a date once a month.
19. Fix my shaking washer/dryer problem.
20. Send out birthday cards to loved ones on time.
21. Make my own Christmas cards.
22. Call in sick :)
23. Take a trip (that doesn't involve an amusement park or a casino).
24. Make gifts..that are worthy of being given.
25. Keep a plant alive for a whole year.
26. Make popcorn balls and share with the office.
27. Eliminate chemical cleaners from my house and my life!
28. Laugh and smile more.

11.04.2009

Kitchen - Life in Grace

Today while aimlessly blog jumping (ya know,following a link from a regular read to a have never read before to another have never read before..but looks interesting so I'll look around for a while) I came accross what will most likely become my new daily read: lifeingrace. Check out this lovely Lutheran, sahm, and modern homeschooler...looks like a lot to be admired for.

Anyway, I fell in love with her kitchen. It's not my style at all, but comes accross so warm, cozy, chic and traditional all with torquise cabinets! I guess that's what drew me in; how wild that color of cabinet is and how effortlessly it just..works. Love it.

11.03.2009

Wants

Some events prompting gifts are right around the corner. I have dropped several hints about inexpensive wants / needs for the bf to pick up on, but in true guy style, he seems to be at a loss for what he could 'get' me that would fill the requirements.

Why is it that guys have such a hard time with gift giving? It doesn't have to be some big expensive purchased gift it could be all kinds of inexpensive..or moderately expensive... thoughtful items. Something to aid in any of the new hobbies I've acquired over the last 6 months..tools, classes, etc. Or just a nice dinner at a restaurant he picked because he thought I'd like it, or even something practical (I've been very appreciative of the vacuum, stand mixer, and other like minded practical gifts that many less great girlfriends would have been appalled at)

But since he's the one at a loss for a gift at the moment, this post is for him. Here are my exuberant, unnecessary flat out wants....
A fully automatic esspresso maker with (the absolutely required in something this expensive) milk frother:

or this digital SLR camera to enhance my blogging and family photos...

Either would be a great option...

11.02.2009

NaBloPoMo

So, today is November 2nd..and I happened to post yesterday, so when I discovered that November is National Blog Posting Month I was free to join (as long as I post today...and every day for the rest of the month!) Well, I'm not promising anything, but we'll see how it goes.

We had a lot of snow last week.


I ended up going to work every day, unfortunantly, and the roads were a mess...but the trees were beautiful. The evergreens where prettier than this leafless one..but this one happened to be in the parking lot and I could get a picture of it without wondering outside into the cold wet stuff...so it will have to do.

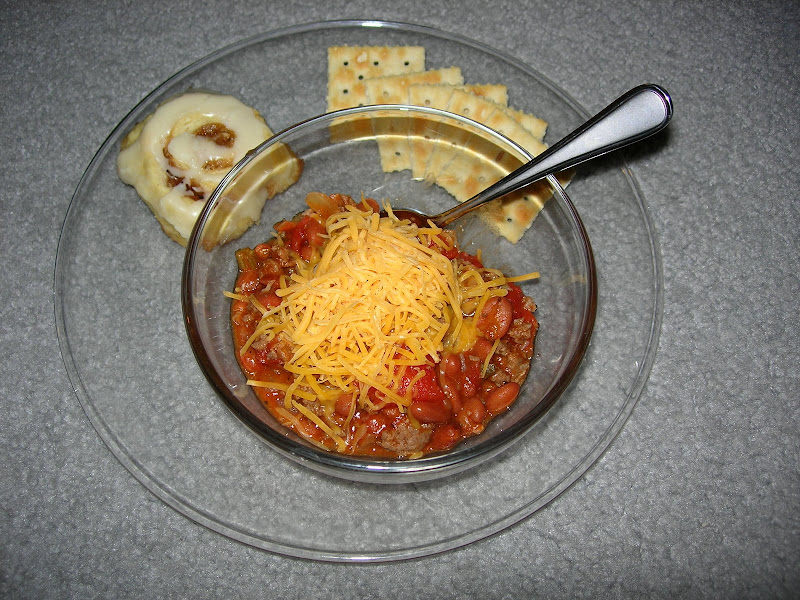
And what goes perfectly with a snowy cold night?...Chili and cinnamon rolls.

I needed the cinnamon rolls to be a quick baking exercise so went with a yeastless variety. They lacked the gooey, chewiness of a good risen roll, but they were fresh and warm and cinammony and buttery and frostingy..and perfect.

No Yeast Cinnamon Rolls
Made up by me...but resembles many online recipes


Dough:
1-1/4 C flour
1 stick cold, unsalted butter, cubed
1/2 tsp salt
1/2 C Milk

Filling:
1/4 C cinnamon
1/2 C brown sugar
2 T melted butter

Frosting:
2 T butter or margarin, melted
3 T softened cream cheese
2 T milk
2 C Confectioners Sugar

Wisk the flour and salt together. Add the cubed butter and cut in until pea sized. Add in the milk a little at a time while mixing with a spatula. When the dough starts to come together, ditch the spatula and get in there with your hands.


Pull dough together and turn out on a floured flat surface. Roll into a long rectangle about 1/4 inch thick.

Spread melted butter out on the dough. Add the brown sugar next (I actually didn't measure...use as much or as little as you want). Sprinkle evenly and then add the cinnamon in the same manner. Roll from the long side of the rectangle towards you so that when you have it rolled up it looks like a long dough snake. Cut into 1" segments and place in lightly greased 9" cake pan, or pyrex, or cookie sheet...I like to have the edges touching so they stay together instead of spreading out. Bake at 350 for 15 - 20 minutes until just starting to turn golden on top.

While they cook mix together the cream cheese frosting by beating the butter with cream cheese. Then add the milk and continue stirring until well combined. Add the sugar and stir until all lumps are gone. Mixture should be thick, but will drizzle off of a spoon. Drizzle frosting on rolls while still hot. Serve warm. Makes 12 small rolls.

11.01.2009

Dr. Bronner's Magic Soap

I've been attempting to cut the chemical heavy cleaning products out of my life. I'm really not one of those crazy, overbearing, tree hugging nut, but I do care about our environment and my own health..and think if I'm not spending a fortune on the more "natural" (the most over used word in recent times) products then it can't hurt, right? I've already started not using soap to clean the kitchen or bathrooms. I was converted by my mother who sells great antibacterial microfiber products and other chemical free cleaning solutions from the Norwex company.

So when I arrived early to a meeting with my homeowner insurance agent last week which happened to be in the same parking lot as the Vitamin Cottage, and I found it on sale...I couldn't resist.

Dr. Bronner's is very gentle, non detergent, castile soap. With one look at the label it appears this stuff is right out of 1969 and to still be so popular must have quite the cult following. it's full of a strange peace and one God kind of messages. I didn't see anything on there that was negative or directly offended my Christian beliefs..so I was in.

After rushing home to google all of the 18 uses the bottle promises I was a little skeptical. Right now I'm using it as a body and face wash and really like it. I want to get to the point of making my own cheap and chemical free dishwashing and laundry detergent (which many people say this stuff can be used for)...but for now i'm still using up the large bottles of warehouse purchased, chemical heavy stuff that I've already spent good money for, but when I make the switch I'll let you know what I think.

10.24.2009

Apple Cider Doughnuts

My day started off with excitement at the possibility of finally aquiring a furry friend. I've been wanted a dog forever. I talk about it all the time and about every 6 months decide I'm really going to get one...Then, like today, the voice of reason (better known as the bf) steps in and reminds me of all the work it will take and how I have a job career that takes me away from the house at a minimum of 11 hours per day.


image and puppies available at Carm's Kennel


Oh what's a dog lovin girl to do. Pay $18 per day for doggie day care...not sure I love her that much, or make her hold her pee for 11 hours every singe day of her life. Doesn't sound like a good situation. So again today, I sounded all of the alarms (called my mom, and the breeder) and then once again realized that it just doesn't make sense. So, I made doughnuts instead.


Apple Cider Doughnuts
...or Donuts ( but I think doughnuts feels more...homemade)

This recipe is all over the blogosphere and a simple google search will give you quite a few options for doughnuts very similiar to these. They all looked about the same.

Recipe adapted barely from here or here

1 cup apple cider
1 cup sugar
4 teaspoons unsalted butter at room temperature
2 large eggs
1/2 cup buttermilk
3 1/2 cups all purpose flour
2 teaspoons baking powder
1 teaspoon baking soda
1/2 teaspoon cinnamon
1/2 teaspoon salt
1/8 teaspoon nutmeg
Vegetable oil or shortening for frying

Glaze:
2 T Apple cider
1 cup confectioners sugar

Boil the apple cider in small saucepan until it is reduced to 1/4 cup (15-20 minutes).

While the apple cider is reducing combine flour, baking soda, baking power, salt, cinnamon, and nutmeg. Set aside.

In a large bowl, or stand mixer with paddle attachment, beat the sugar with the butter until smooth. Beat in the eggs 1 at a time. Turn the mixer to low and gradually add the buttermilk and reduced apple cider until just incorporated. with the mixer still on low, add the flour mixture until dough just comes together.

Turn the dough out onto a generously floured, parchment lined cookie sheet (or the largest flat object you have that will fit in the freezer...I used a cutting board.) Using your hands, pat the dough into a flat sheet about 1/2 inch thick. Place in freezer to firm up for about 20 minutes.

Heat enough oil or shortening to fill the pan up about 3 inches. Insert a candy thermometer and heat until the oil reaches 350˚F (do not overheat oil)

Prepare glaze while oil is heating. Combine 1 cup confectioners sugar with 2 tablespoons of apple cider. Wisk until combined and smooth.

Remove dough from freezer and cut out doughnuts using a 3 inch round. Cut out the center with a 1 inch round.


Place a couple of doughnuts in the oil at a time and cook until golden brown on each side (60 seconds on first side, 30 seconds on second).


Remove and place on paper towel lined cookie sheet. let cool for 1 minute then dip top of doughnut in glaze.

Serve immediately or let cool, store in an air tight container and warm before serving.

Recipe yields 18 doughnuts

10.19.2009

Pumpkin Pie


I've never really loved pumpkin pie. I love the idea of it. I love fall. I love cinnamon and nutmeg, but I always seem to be disappointed when it comes to pumpkin pie. Never as good as I have it built up to be. That is, until I met this recipe. This pie is delicate and delicious. No heavy thick over spiced pie here...just light and fluffy perfection, if I do say so myself.


So this pie was produced..in two hours instead of the usual 30 minutes it takes to whip up a traditional pumpkin pie..., but worth every second as proven by the tiny wedge remaining (need I remind you I only share these recipes with one other person) only 2 days after the baking was completed.

Try it. Seriously. You'll never go back.


Adapted from Cook's Illustrated, November 2008

Pumpkin and Yam Pie

A half-recipe of your favorite pie crust, I used and always use this one.

1 can evaporated milk (12 oz.)
1/2 cup heavy cream (to create a total of 2 cups liquid)
3 large eggs plus 2 large egg yolks
1 teaspoon vanilla extract
1 (15-ounce) can pumpkin puree
1 cup drained candied yams from 15-ounce can
3/4 cup sugar
1/4 cup maple syrup ( I used grade A...worked fine)
1/2 teaspoon ground cinnamon
1/4 teaspoon ground nutmeg
1 teaspoon table salt (I know it seems like a lot..but do it anyway)

Preheat oven to 400 degrees F.

Roll out dough to make 12-inch circle about 1/8-inch thick. Fold loosely in half, then in half again. Place in center of pie plate and unfold. Trim so that there is about 1 inch overhanging the pie plate. Gently push the dough down into the edges of the pan. Trim overhang to 1/2 inch and fold under so that all dough is flush with the edge of the pie plate. Flute or press seal the edges with fork tines. Refrigerate dough-lined plate until firm, about 15 minutes.

Remove pan from refrigerator, line crust with foil and fill with pie weights (I use pennies...way better use of my money than buying pie weights..don't you think?). Bake for 15 minutes. Remove foil and weights, rotate plate. Bake 5 more minutes or until crust is golden and crisp. Remove and place on top of stove to keep warm until filling is ready.

The delicious filling:
While crust is baking, whisk cream, milk, eggs, yolks and vanilla together in bowl. Combine pumpkin puree, yams, sugar, maple syrup, cinnamon, nutmeg and salt in large saucepan (it suggests heavy-bottomed..all I have is cheap aluminum..worked just fine). Bring to simmer over medium heat and continue, stirring constantly and mashing yams against sides of pot, until thick and shiny (it's always thick..I didn't notice much change in consistency..but did get shiny), 10 to 15 minutes.

Remove pan from heat. Whisk in cream mixture slowly, until fully incorporated. Strain mixture through fine-mesh strainer set over bowl (I re-used the milk mixture bowl...I hate dishes), using back of ladle or spatula to press solids through strainer. Re-whisk mixture and transfer to still warm pie crust. Return pie to oven and bake for 10 minutes. Reduce heat to 300 degrees. Continue baking until edges are set (instant-read thermometer inserted in center registers 175 degrees), 20 to 35 45 minutes longer. Transfer pie to wire rack and cool to room temperature (don't refrigerate or pie may not finish setting up).

Serve at room temperature with whipped cream. Store in refrigerator...should last in there until it's been completely devoured..but haven't actually experimented with it.

Enjoy!

10.02.2009

Today

Things I want today:


2. Parson's desk with cute lamp (thrift stored) and some awesome fabric
covered filing / sorting / organizing boxes to sit on top of it whit either
a vintage rolly office chair or a target parsons chair to go with it.

3. The bf's kitchen cabinets to be finished so we can move on to the next kitchen remodel
stage.

4. Laundry to be more fun.

5. Sew one of those dish quilts for my house and the bf's house. Brown with white something print alternated with white grass green zig zags. perfect.


9.29.2009

Working out and Eating Cake?!


The week is off to a great start. I went into the office over the weekend and got caught up on a lot, which is making it sooo much easier to not get behind this week. Hope that trend continues.

Last weekend a long time friend came into town. We gabbed and gabbed and gabbed (the bf was shocked since I don't show that side of myself very often). We had a great time catching up and devising a plan to stick to a workout for 90 days. Yes, you've seen the infomercial on Saturday mornings and late week nights, don't be embarrassed. I'm talking about P90X! I think I watched the infomercial in it's entirety twice thinking I'd never be able to keep up with such a strenuous workout routine, but with renewed focus on working out we decided to commit to it. I'm happy to report that I'm on day 9 and it's going really well. Really well in the fact that I can still walk :) I'm sore every day, but feel a little sense of accomplishment after every workout. I know I'm only on day 9 of 90, but one day at at time is my motto. I was hesitant to post about it since I really really want to go the whole way, but to date have not been very good at following through on work out regimens, but here's to changing all that. And for added motivation the bf has promised a great prize if I make it through the entire 90 days without missing a single workout! (there are repercussions for not making it the whole 90 days as well..but I'm trying to just focus on the positive...) Which will be a challenge considering I just signed up for a basketball league on Sunday nights and to run 7 miles in a relay marathon coming up in mid October. But the pay out to the bet will be worth it! More hints on the grand prize to come...

Speaking of the bf, he has a birthday coming up next week. I fully intend on making one of these...

Image from SmittenKitchen

I'll post a picture of my version of the cake, but don't get your hopes up, I'm sure it will only vaguely resemble the above picture, but hey, it's the thought (and taste!) that counts..right? He loves peanut butter..and I love chocolate, and who am I kidding here, I will eat more of it than him.

I really don't have a plan for the day other than that. I guess I better get a plan...

9.27.2009

DIY Inspiration

Today has been a great day to organize some of my inspiration pictures and I'll share the ones that are the closest to being implemented.

I'm still craving painting the interior of the front door. Black is looking like a great option.


Click here go to the original post.

I'm also inspired by this DIY. It has moved very close to the top of my list of projects. I'm imagining this technique in this color scheme.

image from here

Can't wait to post the after pics!

The project that has been looming at the top of the list for a few months now is the bf's kitchen. Time to get rid of those builder grade, honey stained, oak cabinets. I was first inspired by this amazing before and after. It has taken a while to make a decision, but I think we have a winner!
Here's our mockup cabinet door as a sneak peak.


The cabinets are just phase one of this kitchen remodel on a dime. If only we had more time to work on this project. Slowly but surely we'll get there, and don't worry, I'll share all the secrets!

9.23.2009

Painted Fireplace


Aww..the perfect day...48 degrees and cloudy, sprinkling ever so lightly with a chance of snow this afternoon. Not a huge fan of the snow, but love a fall day and even though it seems we jumped straight from summer to late fall, I'm loving every minute of it. There is just something so calm and comforting in an overcast day. It makes me want to cuddle up with a book (or my laptop). Granted I don't have that option, but the thought is still nice. Guess I'll settle for some hot tea while I take my lunch break...

I painted my fireplace! I know, I know, there are going to be wood lovers that despise me, but it wasn't pretty wood, it was 1970 pine with too light of stain running at an angle with some water damage. Paint was really the best option. I also covered up the nasty cheap beige tile that was flanking the fireplace and making up the hearth. I was a little fearful of this project, but seriously what can't you paint, and with it being up so close to the fireplace it will rarely, if ever get walked on. Here is the less than great before:


I know, I know, the coffee table, TV stand and accessories need a little work. Don't judge, more on that coming... Here is an in process picture after one coat of awesome fix everything primer...It's on its way!
And the grand transformation (with a few other updates...)
Paint can do amazing things. I love how much it brightened and updated the room all for less than $15!

9.21.2009

Chandelier!


I am absolutely in love with my newly painted chandelier! It was easy as pie (since I've made 2 now, I can use that expression...right? ) I simply took the old dirty oil rubbed bronze Gothic looking chandelier outside with a large piece of cardboard and the new chain I purchased for $1 from Home Depot. I then just coated the thing and the chain using about 4 light coats. That is key here...be very careful to not get drips so go light on the trigger finger!

Well here she is hanging in my reading nook! I apologize for the poor picture quality, using the iPhone currently as it's the only thing I've got...for now :)


More house redecorating before and afters to come!

9.10.2009

Peach Pie


The pie turned out wonderfully if I do say so myself. So wonderfully that it was consumed, in its entirety in 3 days by just 2 people...which is why I shouldn't enjoy cooking and baking; especially the baking, so much. I made another just 4 days later and shared it with the in-laws who were in town the night before we all headed out for wonderful sunny, west coast laid back, California...but that's another post for another day.

Today I want to share with you the pie. It started off with the perfect pie crust. I followed the instructions found here to a T because of the fear of pie crusts my mother had instilled in me. However, even if some of my butter chunks were a bit larger than some of my other butter chunks and when I rolled it out it really didn't resemble a circle and had quite jagged edges, a perfectly 12" round was still extracted from it's amoeba-ness and baked up just perfectly (or good enough). I kinda made up my own filling concoction after reading a dozen different recipes for peach pie filling. I decided you really couldn't go wrong with juicy fresh in season peaches. I added 1/4 Cup less sugar than most recipes called for, I really dislike the overly sweet pie, and added in a bit of cinnamon, and of course dredged the peaches in flower first, smooshed it all together piled it in the chilled pie crust and dotted with butter.


Then, because one can never have too much crust and my philosophy is go big or go home, I finished with a lattice top. It may not have turned out looking like the the previous post's picture, but it was fairly good and tasted really good. I rolled out my second chilled round of butter chunked dough and cut it into strips. Then laid them across the top in a weave fashion and as tight as possible because there is no such thing as too much crust!


Anyone that's ever had a fear of pie, fear no more. Run and grab up some of the last juicy in-season peaches of the summer and you will be praised for your efforts.


8.07.2009

Pie Crust


My grandmother, make that grandmothers, would be so proud. I just made a pie crust using one of these beauties.

Making a pie has been my domestic focus of this entire week. I got the itch while reading a great food blog, smittenkitchen. Definitely check it out. The pictures make me want to quit my wonderful engineering job and cook and bake full time in a tiny quaint perfectly decorated and organized, a touch retro a touch whimsical, kitchen...but for now I'll just stick with trying to make a peach pie that my bf will eat. Hopefully when I'm done it will look like hers.
I'll let you know how it actually turns out...


8.02.2009

Steel Cut Oatmeal


My new addiction...steel cut oatmeal. I know I know...I've turned into the cliche middle class turned into Whole Foods trend addict, but seriously it's delicious. It's not the mushy, slimmy stuff that was fed to us as innocent unsuspecting children (which my dad taught me to douse with so much cream and sugar it turned to dessert!) It's nutty, and comforting, and a great hot breakfast. So I've began making a big batch on Sundays and eating it with a smidgen of Almond butter (again with the whole foods business) each mid morning which really has become my favorite part of my work day!

In other news..I got a promotion at work! Hence the busy-ness that has kept me off of here for a while, but don't worry, I have plenty to share...just haven't gotten around to it yet.

More to come..but right now all that I can think about is making marshmallows...like these...


7.12.2009

Selling it off!


So over the past few weeks I've been selling my life's possessions on Craigslist. I love how easy things are gotten rid of or picked up. It really kind of reminds me of the "Swap Shop" that use to take place on my little tiny town's radio station on Saturday mornings. Anyway, I've gotten over the look of my heavy wood furniture and am trying to make my living space a little more eclectic, modern, reused, decorated...we'll see how that all works out :) For now I've gotten rid of a desk, coffee table and old entertainment center. So this weekend I replaced the coffee table and tv stand. I really had these tiny, simple, inexpensive tables from Ikea in mind


...but since I live no where close to an Ikea and they don't ship them...I had to settle for these.


Not bad, what do you think? I also finally got around to painting the chandelier that I purchased(on the wonderful craigslist) a few weeks ago. I really liked these white chandelier of Martha Stewart's and so with that as my inspiration I set off for some white spray paint. Here's the chandelier now. Sitting in the bf's living room.


Maybe in the next couple of week's he'll help me hang it and I'll post an actual after photo. I'm at a bit of a standstill now in regards to the re-decorating. I think that with my warm sienna paint color some great turquoise accents would do nicely...or light blue. I think I'll know it when I see it. Maybe some of these would do nicely. I'm also thinking about painting the inside of my front door. I saw some great inspiration here which is one of my favorite daily reads make sure to check it out!

Off to a great outdoor bbq!...

7.03.2009

Luxury Home Tour


Last weekend the bf and I participated in the Luxury Home Tour. It's an annual event, but the first time that I've actually participated. We were at it from opening 'till close and saw 14 homes. All the homes were lovely....they were all new construction which bothered me on some level and their footprints were not modest. There was a favorite however which did have the distinct recognition of being the only LEED certified home on the tour. The USGBC is doing a great job of promoting and recognizing environmentally friendly construction..I know it's an oxymoron, but there are ways to improve our impacts in every aspect. While the program may not be perfect and people can find loopholes and miss the point of the program, it's still a great start.

Anyway, I digress...
One of my favorite features of this home was a built in, undercounter, stand mixer shelf. I've never seen such an invention and found it absolutely profound. It immediately jumped to the top of my list of wants. I've now had time to rummage the internet and see who came up with this great invention..and if I can order it online. Here is what I found.


Kraftmaid markets a base cabinet that comes with the appliance shelf. It looks like the real deal...unfortunately I'm not in the market for new base cabinets. This is exactly what we saw on the Luxury Home Tour. You can't tell from the pictures that well, but the whole shelf that the mixer is sitting on is on a spring loaded hinge so you just pull up gently on the shelf and the whole thing disappears back into the cabinet! It really is a great idea because the worst part of our wonderful, huge mixers are their size and weight...


Hardware Source sells the mechanism to go in any base cabinet (that meets the size requirements) and at amazon.com you can find Wood Technology's product which doesn't look quite as good in the picture, but the price is right. I may just have to try it out. If I do, I'll let you know how its working and if any of you have seen these modern wonders anywhere else, please fill me in!

7.01.2009

day 1

After recently becoming addicted to several blogs covering a wide variety of topics,...really any blog where I can tell the author is passionate about their posts captivates me...I decided to start my own. I hope that someday this space may summon the same kinds of feelings, but honestly, right now, this blog is about me. A way to actually put a place in my life for all of the things that interest and inspire me. There is so much more to me than what is evident from most on-lookers. This will be a place to display my interests, accomplishments and document new endevors and adventures.

Hope you enjoy it as much as I do.